10 Easy Steps To Create Your Travel Blog
This site contains affiliate links to products. We may receive a commission for purchases made through these links.
Hooray!! I am so happy that you decided to read this blog post. This means you aren’t just talking about how you want a job that will allow you to see the world, like to so many people do, but you are ready to do some of the work to get you there. So first off congratulations on making this first step from hopes and dreams to some real-world action. So let us begin!
I have outlined a number of reasons why I think having a Blog is essential for just about everyone in 21st Century, especially for those who love to travel. I am guessing you already read this if you are on this post, but just in case I outline my top 5 reasons in this blog post here.
I won’t go into all the details, but two main points that I discuss are how incredibly quick a blog can be started and also how cheap it is. I mean you can have a blog up in mere minutes, spending less than $100. Where else can you start a business that fast?
The next step after hopefully giving you this “ah-ha” moment is that I now want to provide clear cut steps of how to start your personal blog. To set the stage let’s define some things: Domain Registration and Hosting.
Domain Registration and Hosting
So every blog needs a way to be accessed on the World Wide Web with a website URL and that is called your domain name. This domain name is typically free when you sign up for hosting through a hosting company like Bluehost. Our domain name is WeWorkToTravel.com. Hosting is essentially the rent you pay to allow your domain name to be accessed on the Internet. You hosting provider also gives you the space to store your files (picture, videos, css, html files etc) and the ability for some potential viewers to be able to find you. I love me some Bluehost for both domain registration and hosting. They are the most reputable company out there, have the best customer service, and competitive pricing.
Reserve Your Domain Name
Now part of the struggle with starting a blog is thinking of the perfect name and then hoping and praying that domain is available. Well, we have been down this road before so here are some things to consider.
1) Choose a Decent Name and Keep It Moving – You can spend hours, days, weeks, and even months trying to figure out what you should call your Travel Blog and then your domain name. I am not saying to take it lightly as an awesome name can really benefit your brand. However, don’t let that hold you back from doing the actual work of creating content and creating a following for your blog. I started off with calling us WeWorkToLive.com and 2 months later I changed it to WeWorkToTravel.com and it was pretty seamless to change on Bluehost. So you can always change your domain as long as the other option is available.
I really like Bluehost’s Domain search engine. It’s clean and would highly recommend you use it. Start searching to see if your domain is available today.
CLICK HERE to see if the name you want for your website is still available
2) Your Blog Name May Differ from Your Domain Name. So the internet is so oversaturated these days it will likely be hard to find the Blog name you want as well as the domain. We ended up having the same for both, however, trust me, WeWorkToTravel was not even in the top 10 list of names we wanted lol. We had to make some compromises. Long story short, it is OK if your domain name and blog name do not match verbatim. Putting in a “We” in front of it may not be bad idea which is what we did because we did want it to match.
3) Consider Extensions Outside of .com – Now, do this at your own risk but since the URL world is getting so saturated, some companies are starting to use .net, .io, .org, etc. options. I preferred to keep WeWorkToTravel as .com because we have been programmed to type .com at the end of everything but wanted to let you know this was at least an option.
4) Domain Names can be Free or Cost up to Millions – So there are hustlers out there that have registered a ton of different domain names with the hopes of someone like you wanting it one day and them being able to charge you a premium. As I was searching for other domain names, some laughably cost tens of thousands of dollars lol. Don’t do it!!
Select Your Hosting Company
So again, you need to pay rent to a hosting provider to allow your domain to be accessible on the Internet. I really like Bluehost as I have said. I have actually used them as a hosting provider and for my domain registration for a different business all the way back in 2005 when I was in college. It just shows you that Bluehost has been around for a while and is reputable. It also shows you that I kind of old lol. I use them now for WeWorkToTravel and through them I also got a FreeFirewall through their partner company SiteLock (not sure if its free anymore).
Also, their customer service is superb! When someone tries to hack your site, which has happened to us a number of times, you want to ensure you can get a hold of your hosting provider and I never had a problem. I also had issues where I used a “free theme” with one of my first developers and my site crashed a number of times wiping out everything. Bluehost was able to recover a lot of it to help me get it back up and running.
Bluehost, as with most other hosting companies offers you a free domain name when you sign up for hosting for 12 months or more. If you go beyond 12 months your domain will still remain free but your hosting monthly cost will go down. I planned to do WeWorkToTravel for the long-haul so I actually did 36 months. Long and short of it, at least do a 12 months so the domain is free.
OK, now let’s get your Blog up and running in 10 easy steps which I have outlined below. Look at that, I even added pictures!!!
10 Easy Steps to Get Your Blog Up and Running
Step 1) Click the below link and select a package. I would recommend selecting the “basic” package as I haven’t even needed to upgrade yet. – Save dem $’s
https://www.bluehost.com/web-hosting/signup
Step 2) Enter your desired domain under the “new domain” window and click “next”.
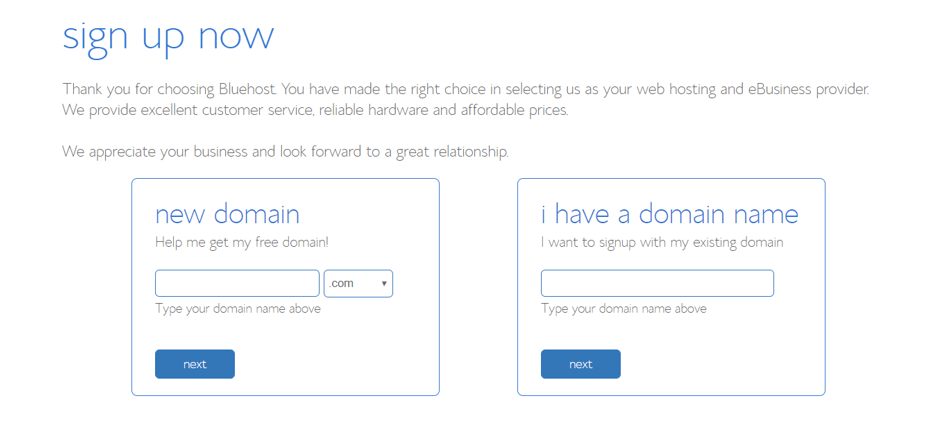
Step 3) If your domain is not available then it will bring you to this page and give you recommendations of other domains. You can play around with names until you find one that works for you. I tried to register wakandalove.com but someone already had it. However, wakandaloveme.com was available. If you already identified an available domain it will bring you to the next step.

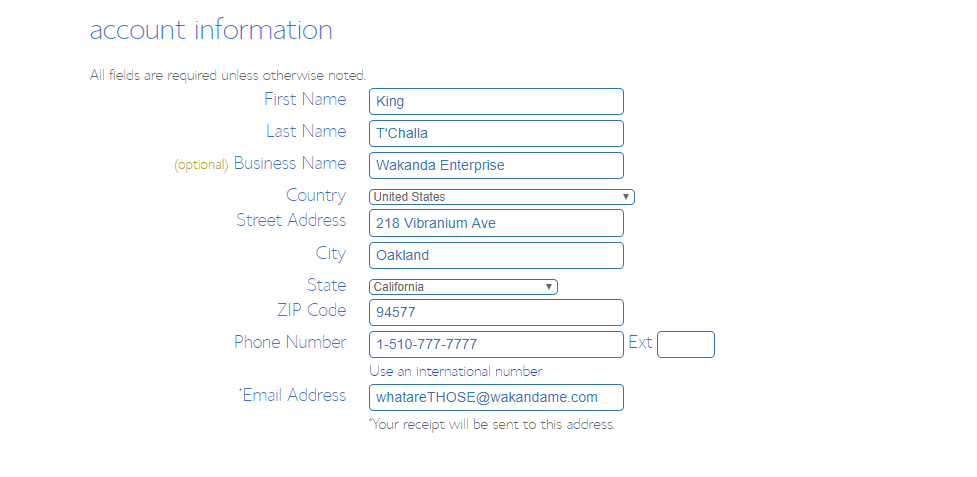
Step 4) Enter in your Billing Address Details. Anyone else live on Vibranium Ave?
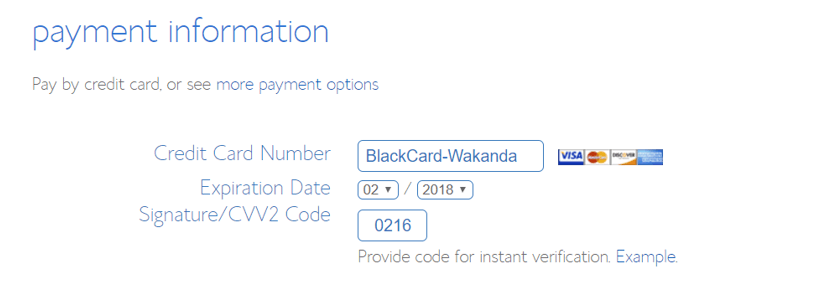
Step 6) Provide Package and Payment Information. I was initially going to recommend not to select the Domain Privacy Protection but if you don’t you will start to get hit up by a variety of marking companies, I would pay the extra $.99 a month. However, if you don’t, your total price would be right under $100.00

Step 7) Create Your Password. Make sure it is good one. This your business.


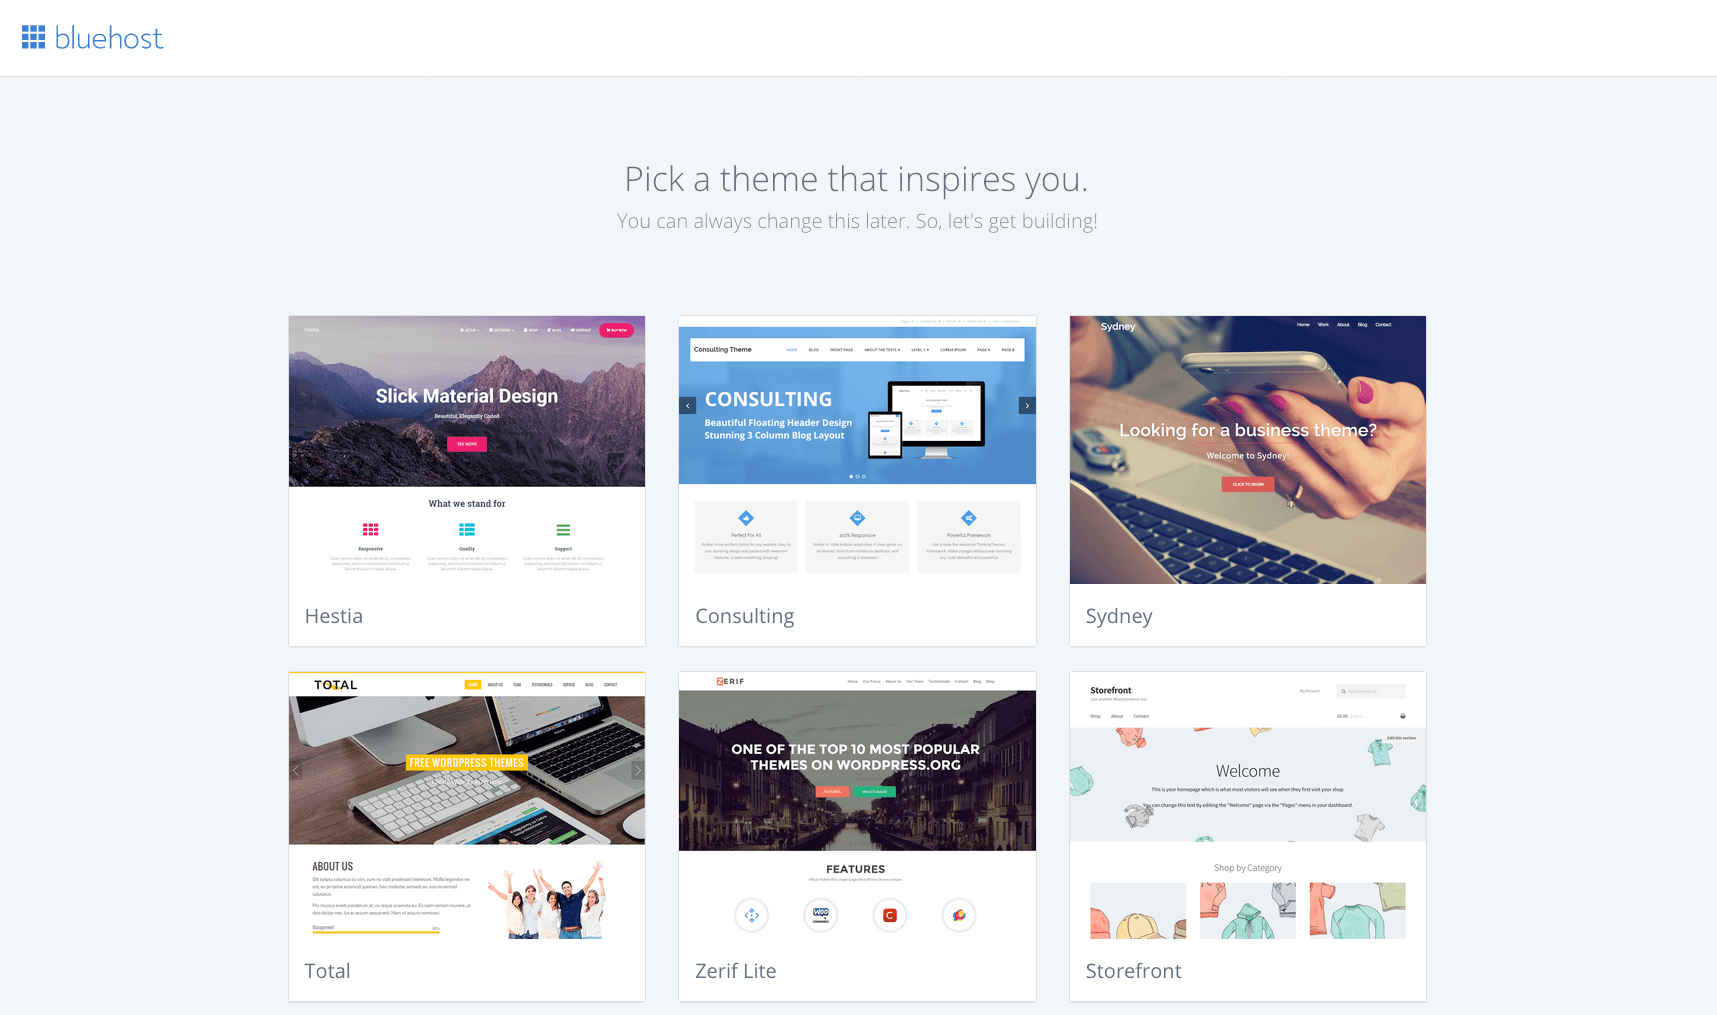
Step 8) Pick a theme. You can just use one of these as a placeholder for now. You can spend some time looking up other themes a bit later. I will give you some options towards the end of this post.
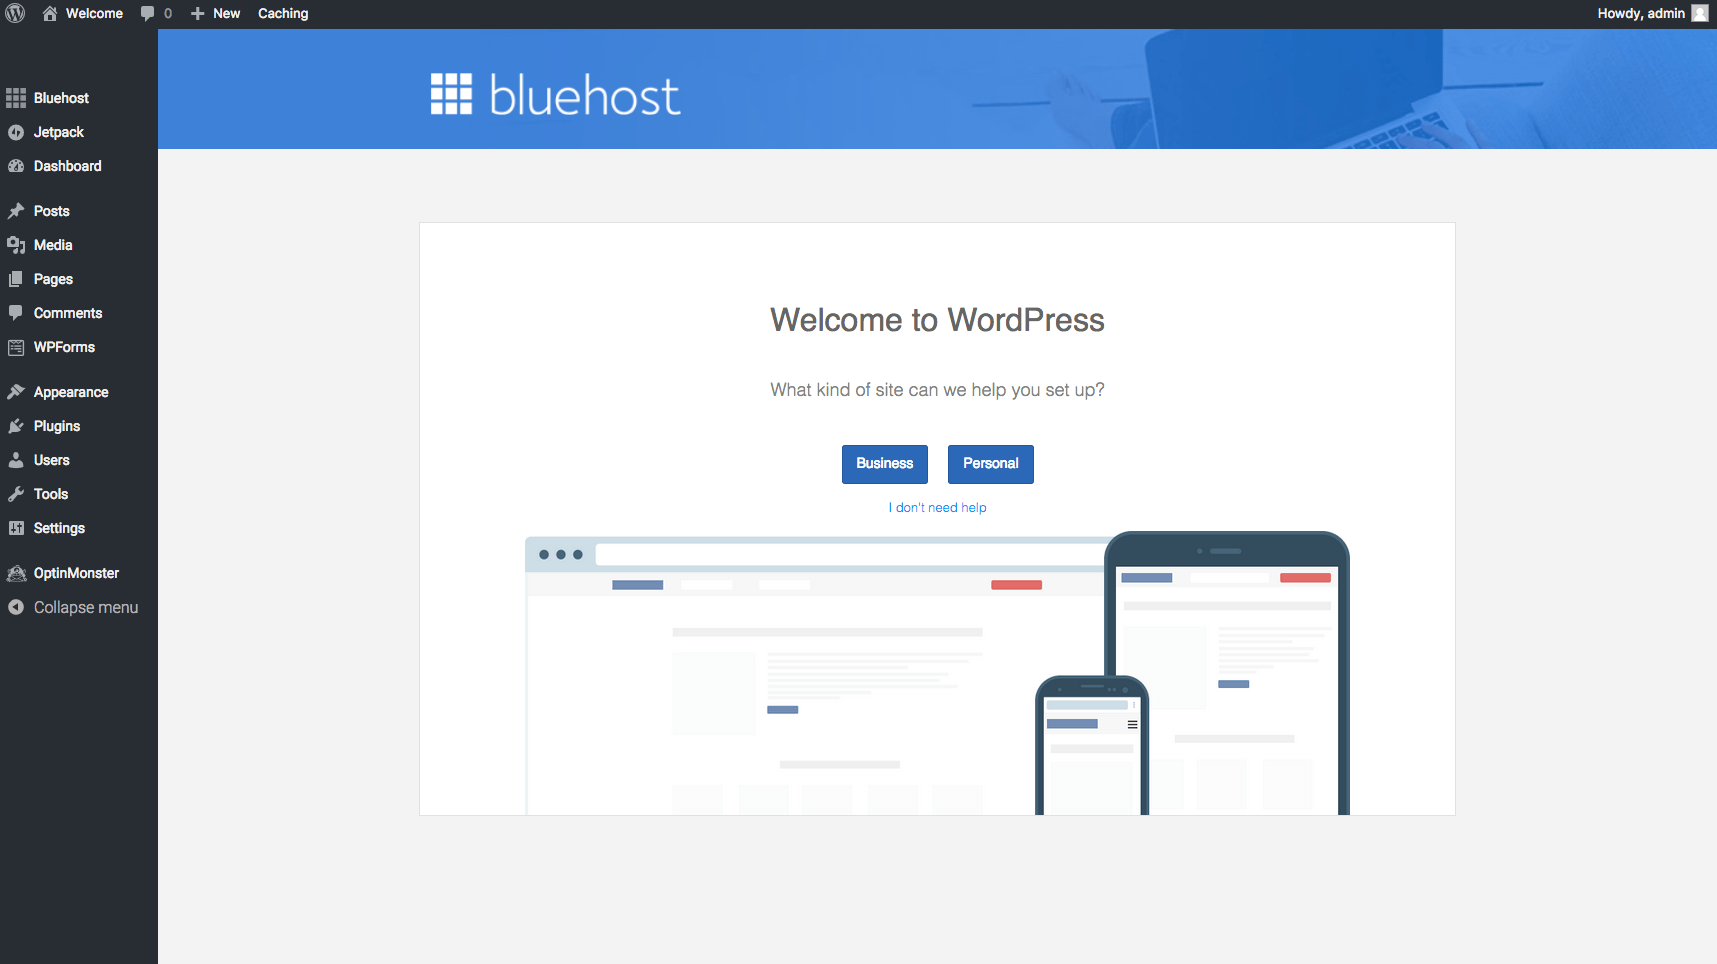
Step 9) Click on “Start Building”. This will take you to your WordPress Dashboard. WordPress account for about 30% of all websites on the internet so it makes sense why Bluehost makes it so easy to integrate with them.

Step 10) On the next screen, you can choose “Business” or “Personal”. You are starting a blog so select business and then you then Voila, you will be able to Launch you site!!
GET EXCITED!!! If you reached this point, you now have a WordPress Blog!! We can drink to that! If you have any issues please reach out to me at info@greenbookglobal.com. I would love to help you out in any way possible. If you have read my other posts you know how passionate I am about people having a blog these days.
General Tips
- Logging into your Worpress Dashboard – To login to your wordpress backend it is pretty simple. Just type in http://yourdomainname.com/wp-admin, enter you username and password and you are in!!
- Once inside the dashboard there are a variety of components that you will see. I outlined some of the key ones that you will find in the Left-Hand Pane:
- Click “Post” to start writing your first blog post
- Click “Media” to upload videos and images to your wordpress site
- Click “Plugin” to find plugins to add to your site. Wordress has over 40,000 plugins, so whatever you are looking for, it is there. Just make sure it is rated highly and the it has recent comments and the community is active. Keep your plugins up to date. Although there may not be any changes to the front end of your site, they are typical security updates so this will help to ensure your site is safe from vulnerabilities.
- Click “Appearance” > “Themes” to look for additional themes. Look for free ones and if you find one, great!! Play around with them. The beauty is you can always change it back. However, it may be a good idea to get a premium theme (one-time payment: $39-$55) just to ensure you get exactly what you want. I have my own personal horror story with using a free theme lol. I like Themeforest, Envato, and Elegant Themes. You can typically download the theme to your desktop and just upload it to the same directory you are in now by clicking “Add New” > “Upload Theme” buttons at the top.
- Click ““Appearance” > “Widgets” to update content in Side Bar, homepage, header, footer etc.


Leave a Reply
You must be logged in to post a comment.